

It's finally time for a new edition of my Free Pattern Finds series, where I share details on free patterns I've found and add my experience trying them out. These are patterns that don't cost a thing, so you can go grab 'em yourself for FREE!

I've seen things like this go for crazy prices in catalogs, so being able to make your own is a real coup. It looks so complicated and interesting, but the secret to making it isn't:

I saw a knotted pillow in a promotional pic at Joann.com when they had a sale on fleece a while back. I had that immediate and irrational "I've GOT to make that!" sensation. Weirdly, they didn't promote it there, but with a little digging I found they it in their free project section here. Yay! Of course, the directions were what you'd expect for free (Boo!), so I'm going to give some helpful details to make this easier for anyone else who wants to have a go at one.
Pattern Details: The basic instructions are simple - you're cutting fabric in strips and stitching them together to make a super long fleece tube, then stuffing it with polyfil. The stuffing is the most tedious and annoying part. It will feel miles long, with no end in sight, so this is a good task while watching tv or when stuck on a long phone call.

I used a yard stick to help stuff mine and I also left both the ends open so I could stuff in either direction instead of trying to jam everything down several feet from one side. Be forewarned, all the stuffing, and later twisting, really strains the stitching. They say to just do a normal straight stitch, but I had the not-so-pleasant experience of having the thread break in a few places while stuffing and having to re-stitch those areas. I wasn't being too rough either, so I'd recommend being super careful or possibly using a serger or, if you can stand the monotony, double stitching the entire length. I'd definitely do that if making this again.
Lastly, the key part: the knotting. I'm a really visual learner, but the line drawings with how to twist the length around just weren't cutting it for me. I made several attempts that looked totally unlike the final photo, so I did a bit of research and found another how-to for the same thing that had much clearer step-by-step photos of the actual knotting over at eHow here. Much easier and I finally got that perfect double knot look:
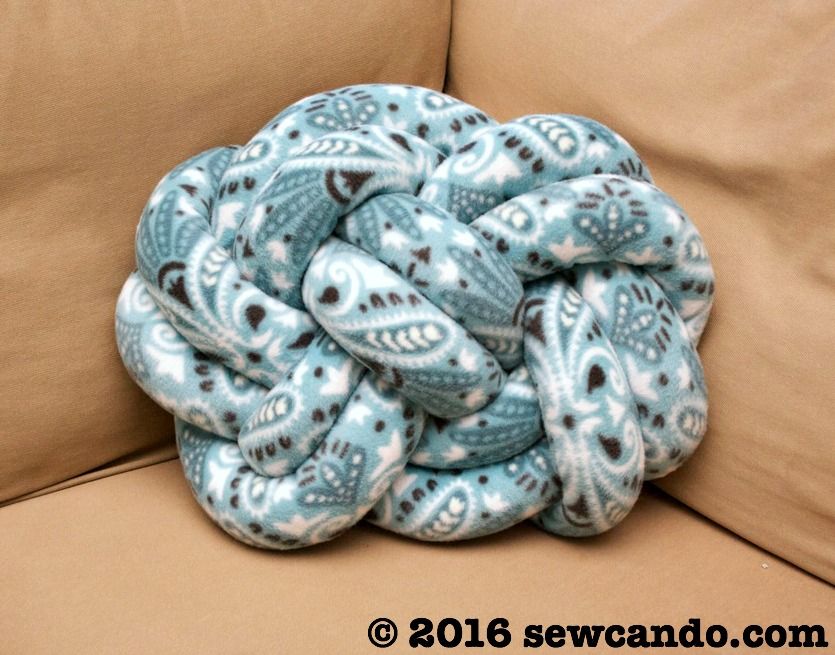
I'm pretty happy with how it turned out and think I'd make this again. The eHow tutorial also had a handy tip for easier stuffing by using a cardboard tube, so I'd give that a go too. I made this pillow for me, but seeing how nice it looks, I think this project may go on my gifts-to-make list!
Got a freebie pattern find you love? Share it in the comments so we can all try it out!

Thanks! That took a lot of work and effort, but it certainly paid off. I may have to give it a try.
ReplyDeleteIt's worth giving a go Renee and makes a nice gift!
DeleteSo very unusual! I have never seen these before. Good job on the perseverence; I don't believe I'd have the patience for that... at least not any time soon. But will bookmark and keep in mind. ;-)
ReplyDeleteIt was one of those projects that seemed tricky because it was the first attempt, but now that it's finished I think the next time it'll be easier. If you use my hints from hindsight, it'll make it a lot better, I promise!
DeleteI'm curious, couldn't you use a lofty quilt batting spray adhesive it and then sew your tubes?
ReplyDeleteIt would probably make turning it right side out more difficult since the tube is VERY long.
Delete