
I don't know about everyone else, but despite wanting to get all fun & festive with Fall projects right now, I barely have time for them. Between back to school, shorter days, the start of extracurricular activities and loads of "get done before it's cold out" tasks around the house, I'm lucky to get a free moment to eat or dry my hair let alone create something new. So if you're like me and longing to make stuff, but short on time, today's project is for you!
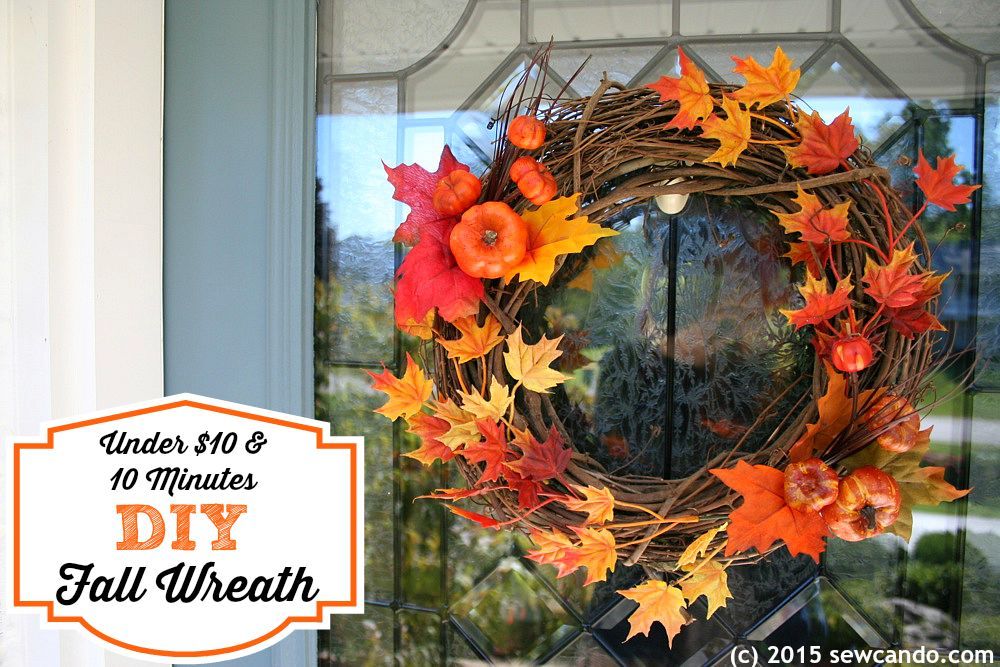
These wreaths involve next to no time & effort and have a very minimal cost. They can be done for under $10 each and in about 10 minutes. No joke.
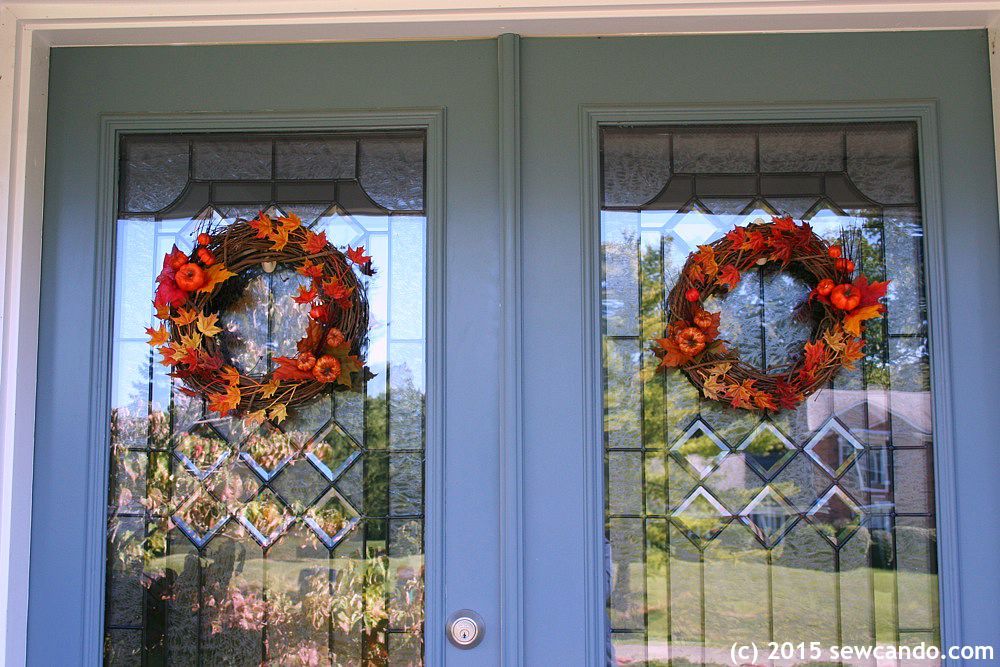
Crafter's Confession: I actually planned to just buy pre-done wreaths for my front doors due to my lack of maker time, but even the sale prices would have required about $40 for a pair. No thanks. When I looked at the supplies for the foam forms, ribbons, burlap, etc. that most people use to make wreaths, it'd still be about that price. Boo! And that doesn't even include finding time to get all artisanal. So I got super basic instead. And the effect is anything but basic-looking:
A Fall wreath for under $10 and in 10 Minutes:
Materials:
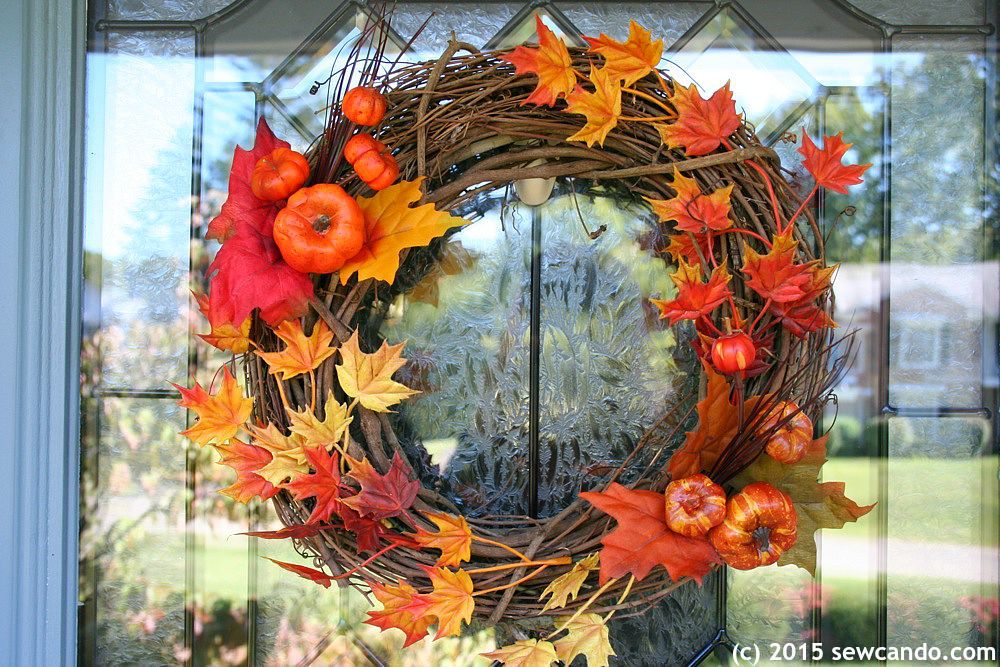
- Grapevine wreaths (mine were the 12 inch)
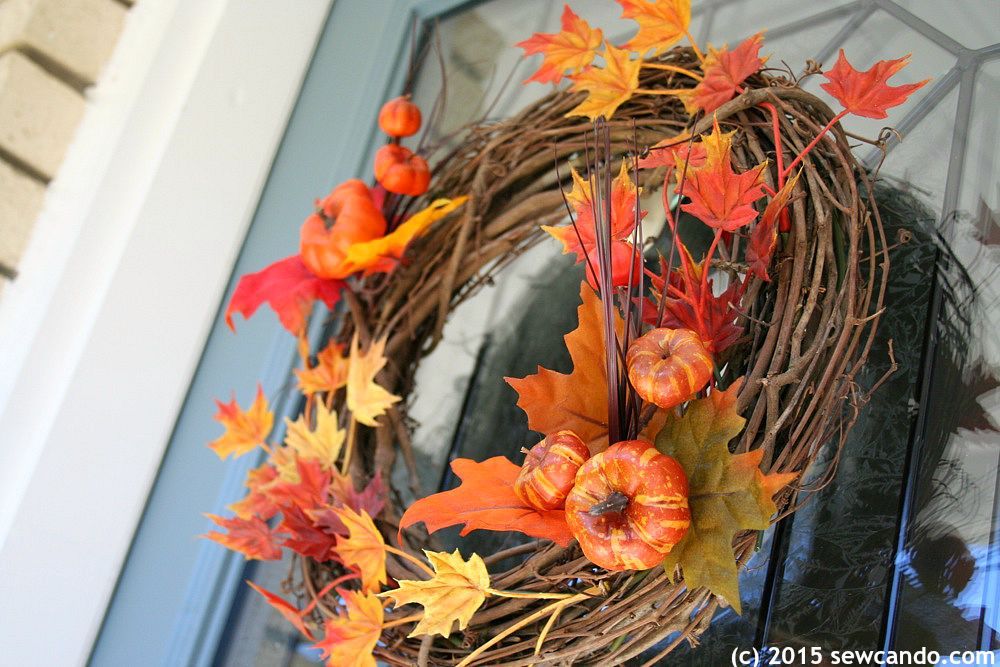
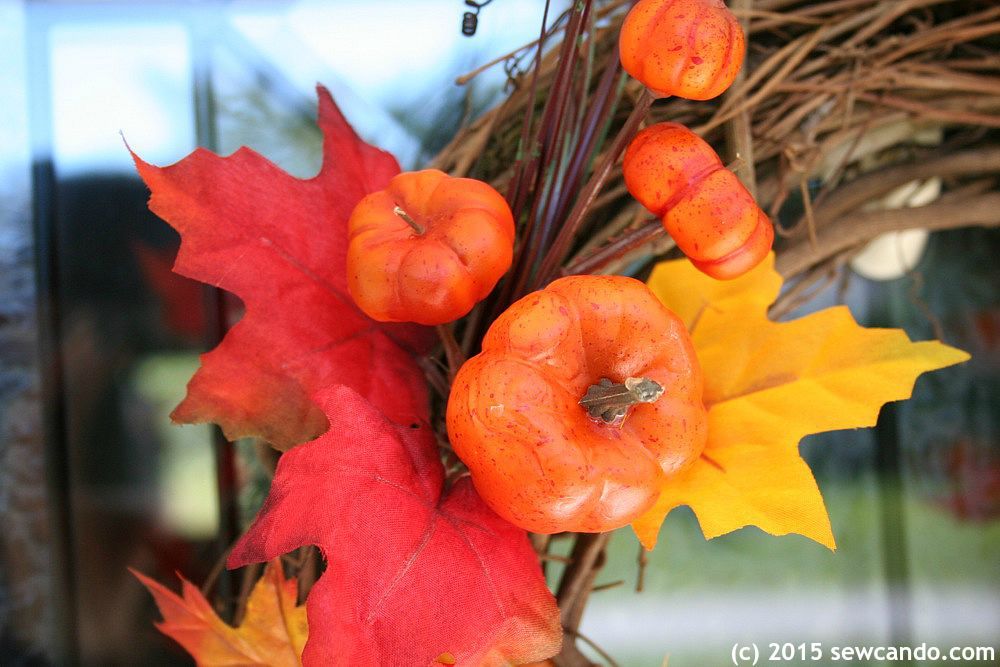
- Wire staked Fall decorations - mini-pumpkins, leaves, etc.
- Wire clippers
- Optional: hot glue gun & florist wire
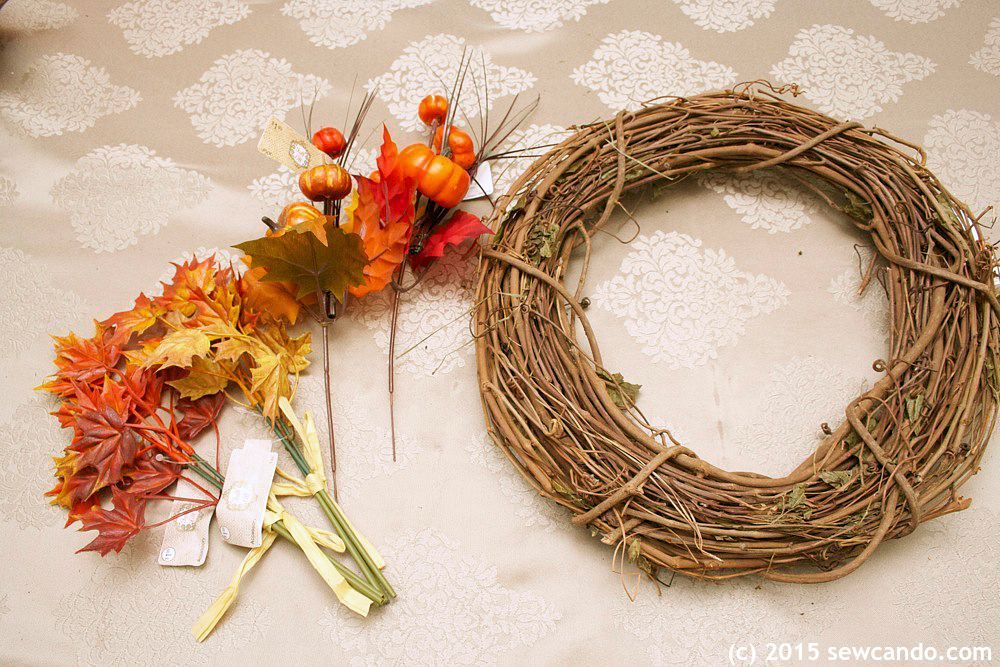
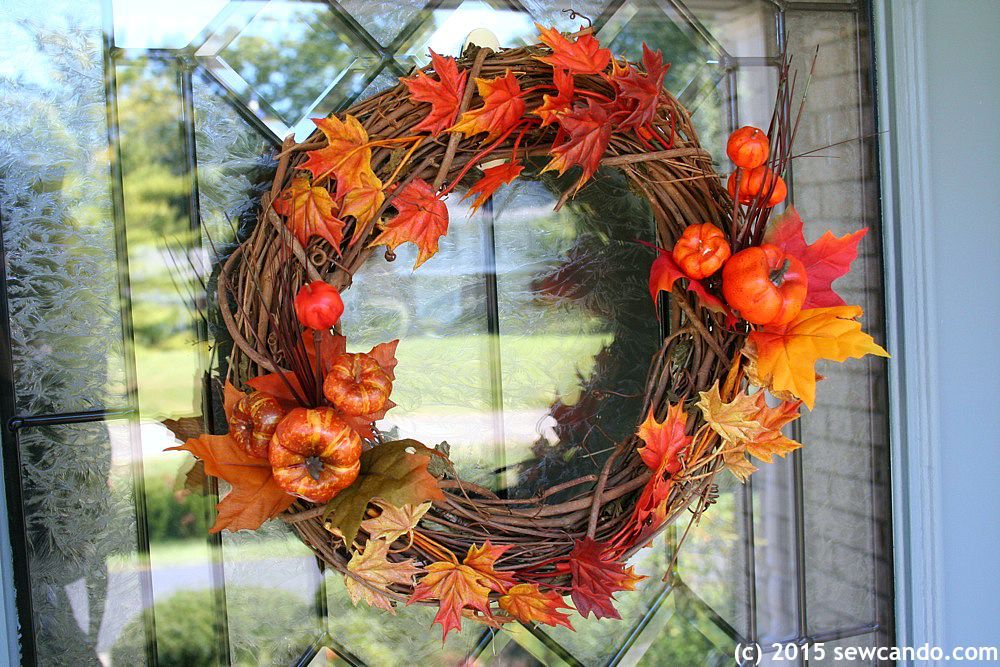
The real key to the cheapness is the materials used - unadorned grapevine wreaths are pretty inexpensive (mine were $4.99 each at Jo-Ann Stores plus I had some 40 & 60% off coupons to knock 'em down even cheaper). Part of the ease of this project is that the wreath base itself is already decorative - you don't need to cover it fully. That's a huge time & supply cost saver.
The small staked items were on sale for 99 cents apieceI used 4 per wreath. Each wreath's total cost about $6.50. The same size foam wreath form costs at least that much and that's not including any decorations!

Bend the wire stake slightly first. This makes it easier to feed into the grapevine and helps it automatically weave into the wreath rather than just poke out the back.
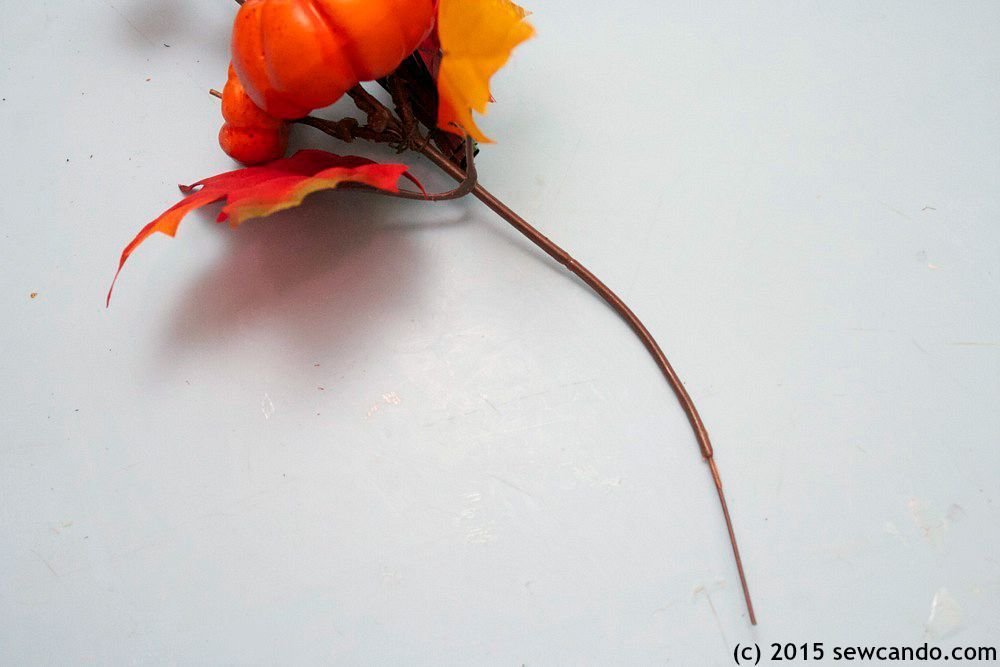
Push it in firmly, but don't jam it or you'll break the vines. If the end does stick out, feed it back in between the vines.
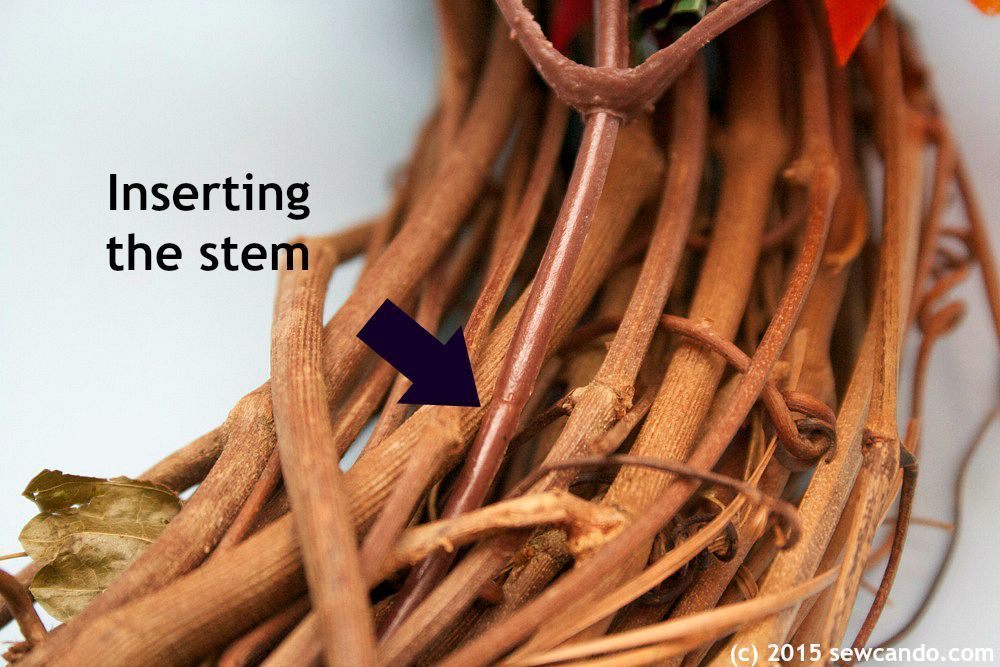
If the vines seem too tight, gently pry them apart with your finger while inserting a stake.
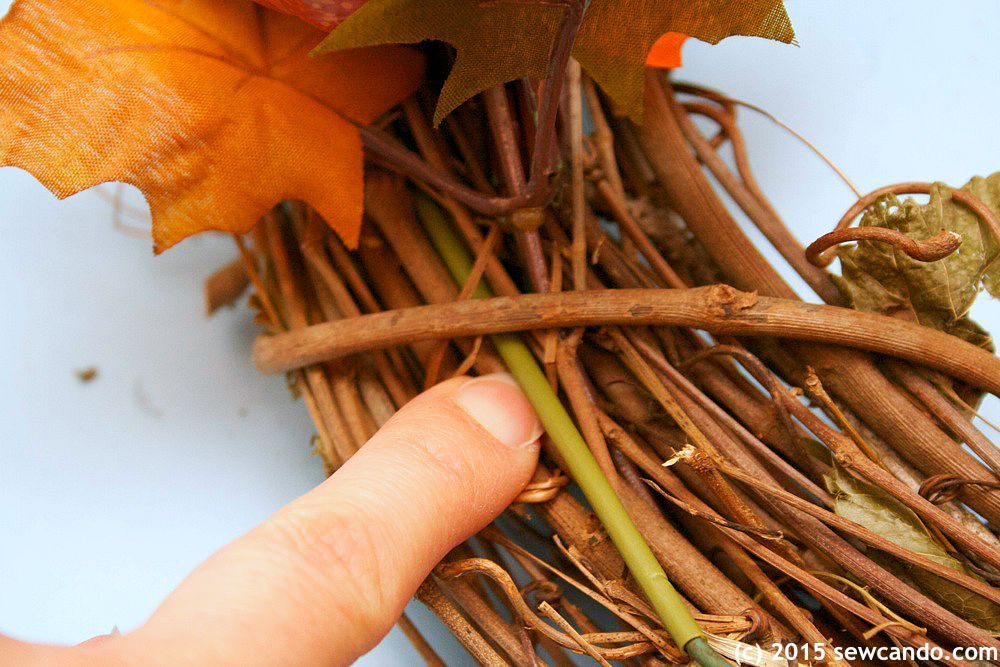
Layer the leaves so the stems or any exposed stake bits are easier to camouflage.
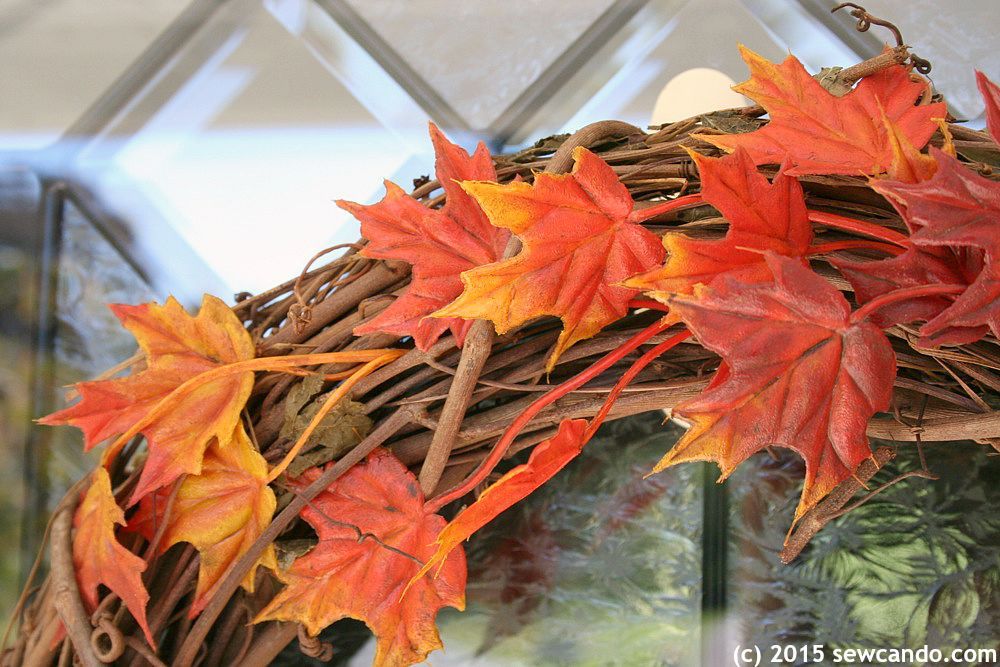
To attach stems or branches permanently you can use hot glue or loop a bit of florist wire around them, but I found mine to be pretty firmly attached. I anchored some of the floppier bits by weaving them under a single vine. Maybe if the wind gets crazy as the weather changes I'll reinforce them, but for now things seem good.

Same goes for attaching the wreaths to hooks. The tension of the vines seem to hold them onto my door hooks well, but if needed, I'll add a multi-strand loop of wire to the backs to hang them.
And there you have it. Ready to hang in next to no time & still light on the wallet! Who says Fall crafting has to take hours in order to look good? Not this lady!

LOVE this! Simple but a great fall wreath!
ReplyDeleteI love throwing together a wreath in a pinch. Always need a wreath right?
ReplyDeleteHeck yes! Especially when they're easy to make & inexpensive too.
DeleteFast, easy, and very cute wreath. Thanks for the tutorial, Cheryl!
ReplyDeleteLove this! Thank you so much for the tutorial--I can't wait to make one for our home!
ReplyDeleteI hope you do:)
DeleteI love the colours and the mini pumpkins are so cute!
ReplyDeleteThe colors really pop against the grapevine. Everytime I pass the doors I love them a bit more.
DeleteLove this! Looks so good! Pinned and tweeted. We truly appreciate you taking the time to be a part of our party. Please stop by and party with us again. The party starts Monday at 7 pm and ends on Friday at 7 pm. Happy Sunday! Lou Lou Girls
ReplyDeleteThanks so much Kimberly!
DeleteThis is so pretty!
ReplyDeleteThank you for sharing this week at Brag About It link party on VMG206 (Mondays at Midnight). I plan to feature you next week!
~ Megin of VMG206
I love this idea! We are on a strict budget so this is exactly what I'm making for our door! Thank you for taking the time to do this post and to show us how to be pretty on a penny! HUGS!
ReplyDeleteFantastic! No reason not to be able to do cute on the cheap;)
DeleteVery pretty and I just love that it is so economical! Thanks for sharing with us at the Hello Fall linky. Pinned.
ReplyDeleteThanks so much - I'm all about projects being economical!!
Delete