
This is a Sponsored post written by me on behalf of Duck Brand provided by ShurTech Brands, LLC. All opinions are 100% mine.

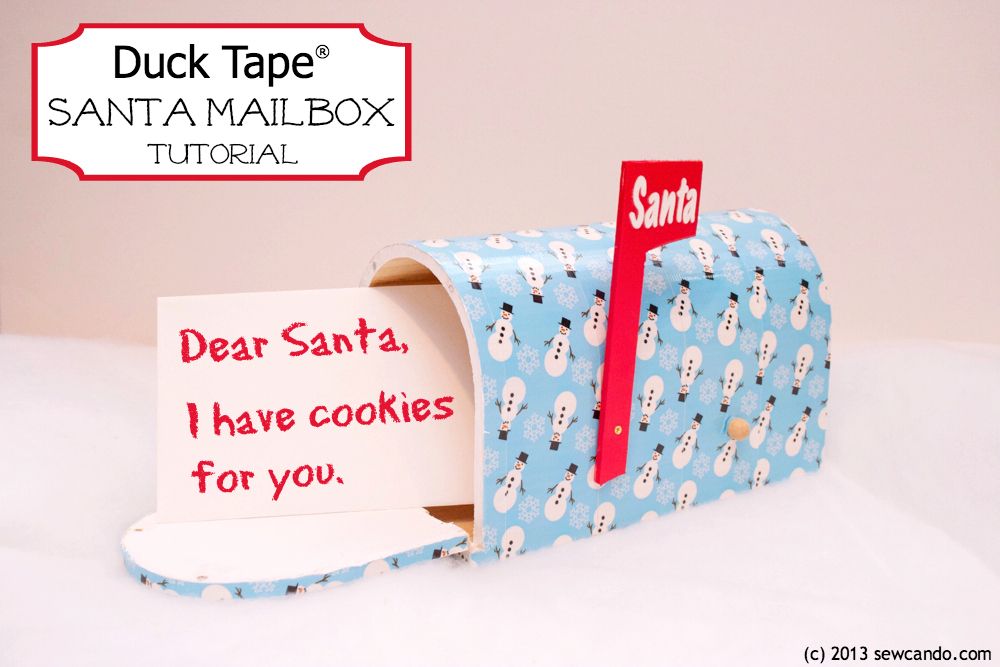 Looking for a fun & quick holiday project? Duck the Halls by using some Holiday Duck Tape® to make a sweet mailbox for Santa. The kids can mail their letters "North Pole First Class" - minutes after you make it!
 This was my first Duck Tape® project and I was really surprised at how fun & easy it was to use. The Duck Brand® Holiday designs come in great seasonal prints like Snowman, Seasonal Sweets, Holiday Bows & Penguin. These are ideal for holiday projects like frames, stockings, coasters - even gift wrapping.
Now come see how easy it is to make one of these for yourself:
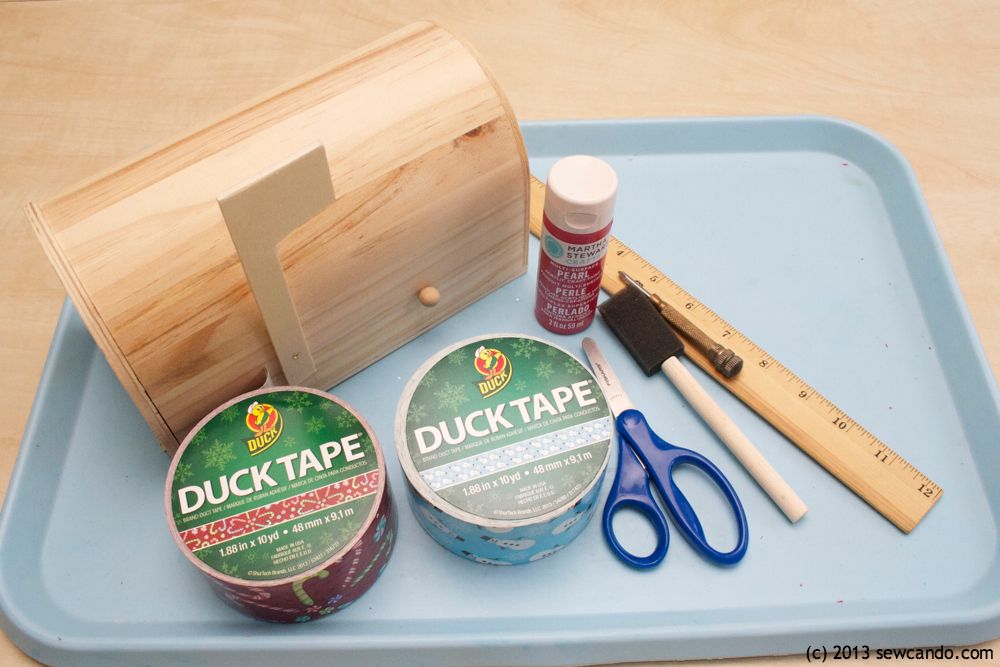
Materials:
Continue laying strips side by side. I cut a small notch to press the flag stop knob through and a small hole for the flag screw:
With the door open, trim the last piece's overhang over the front.
Cover the front door as the back side, trimming around the hinges:
Wrap the door edge with another strip and trim as done previously. Paint inside of door and rim with acrylic paint.

Now take the flag and paint with the acrylic. I found it easy to hold it in place with a toothpick in the hole. Do two coats on all sides.
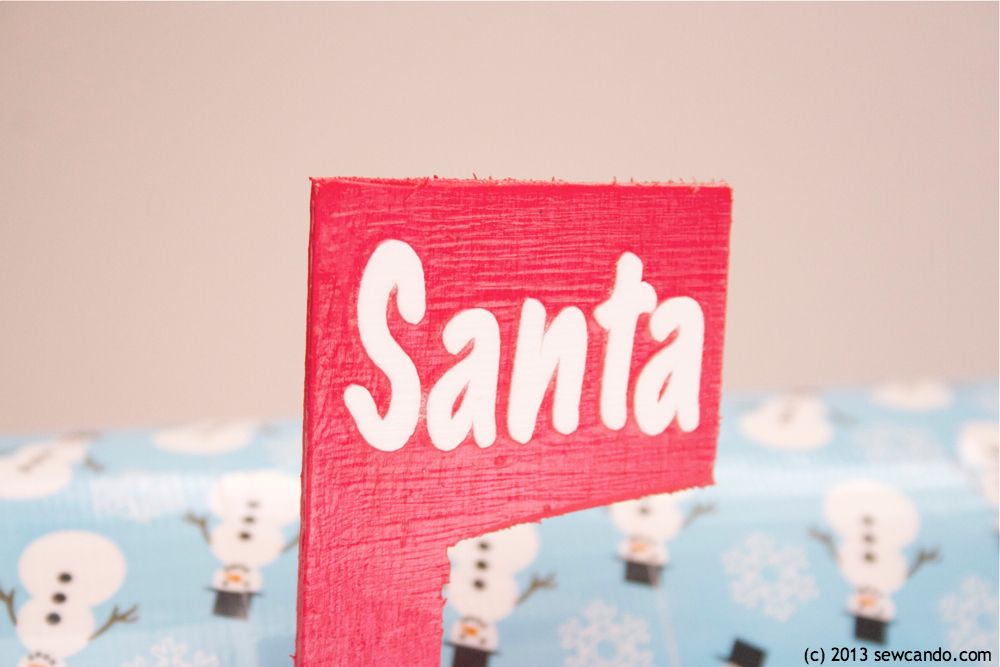
Next cut out card stock lettering using utility knife or cutting machine:
Add a thin coat of Mod Podge to flag front, place lettering on top and seal with a further two coats of Mod Podge on top.

When dry, screw into mailbox.
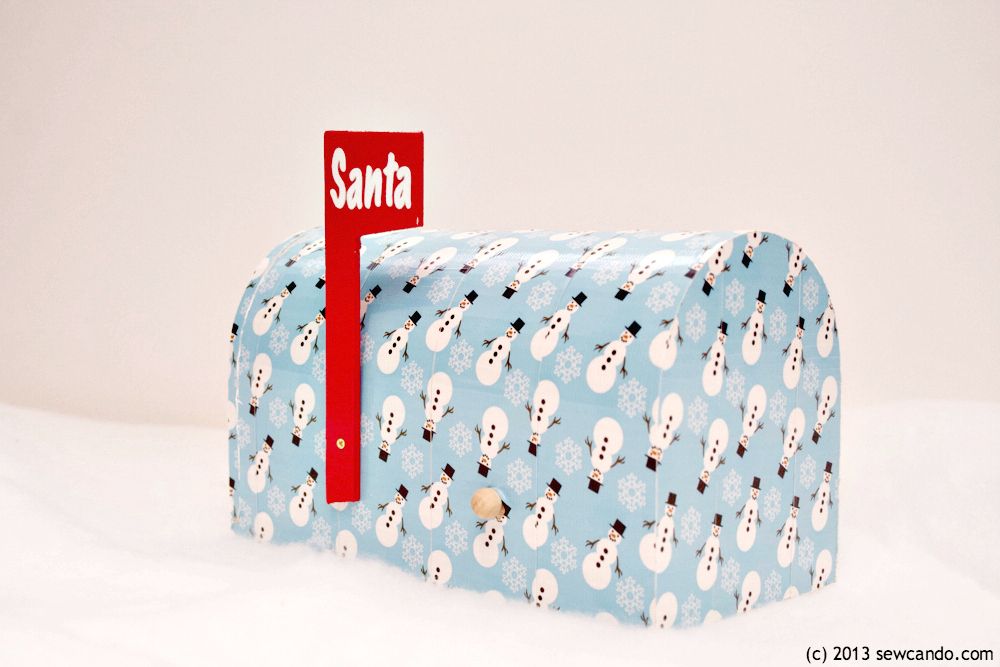
Now the mailbox is ready for letters and the big guy in red can find out what's on everyone's wish list.

Follow Duck Brand® on Twitter @TheDuckBrand for more fun project ideas and share your own on Twitter & Pinterest with #DuckTheHalls hashtag!

I'm also sharing this project with my FAVE LINK PARTIES.


Now come see how easy it is to make one of these for yourself:
Materials:
- Duck Brand® Holiday Tape
- Unfinished wood mailbox (available at most craft stores)
- Utility knife & cutting board
- Acrylic Paint & paintbrush
- Cardstock
- Mod Podge
- Ruler
- Scissors
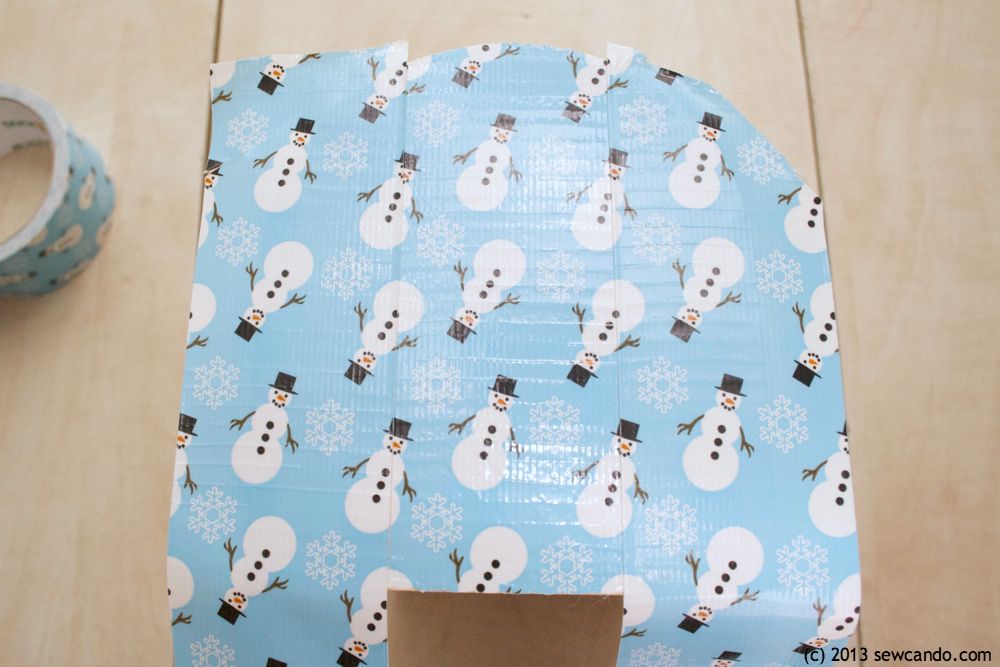
Start by temporarily removing the flag. Mine was screwed on, so it was easy to remove. Set aside. Begin at back side of mailbox and lay strips of Duck Tape®, lining up design of strips (if possible). Make sure strips are slightly longer than mailbox so there is overhang to cut away.
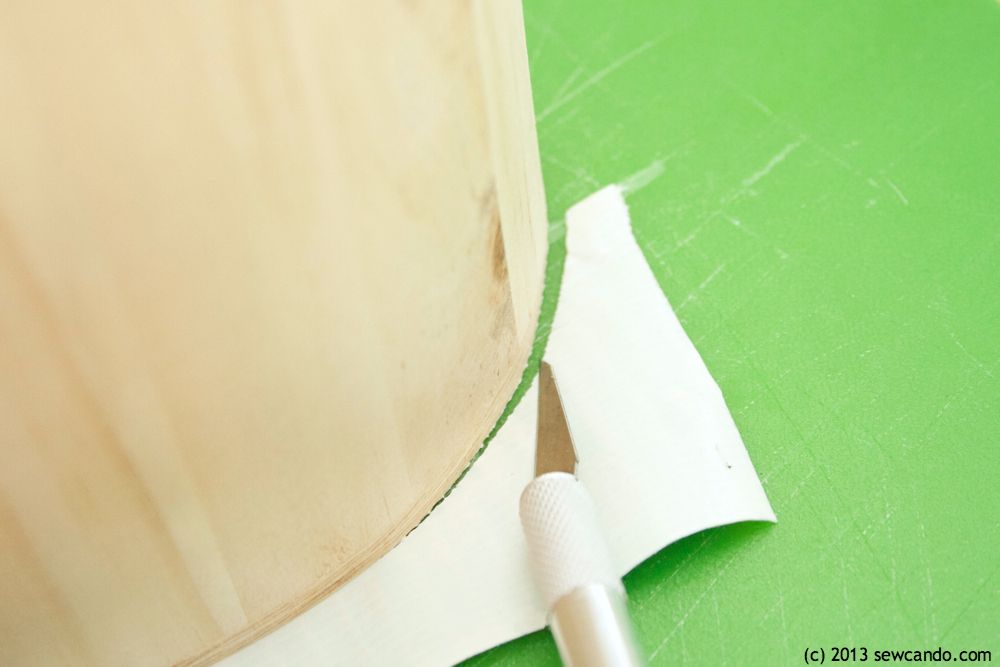
Flip upside down and use utility night to trim away excess:
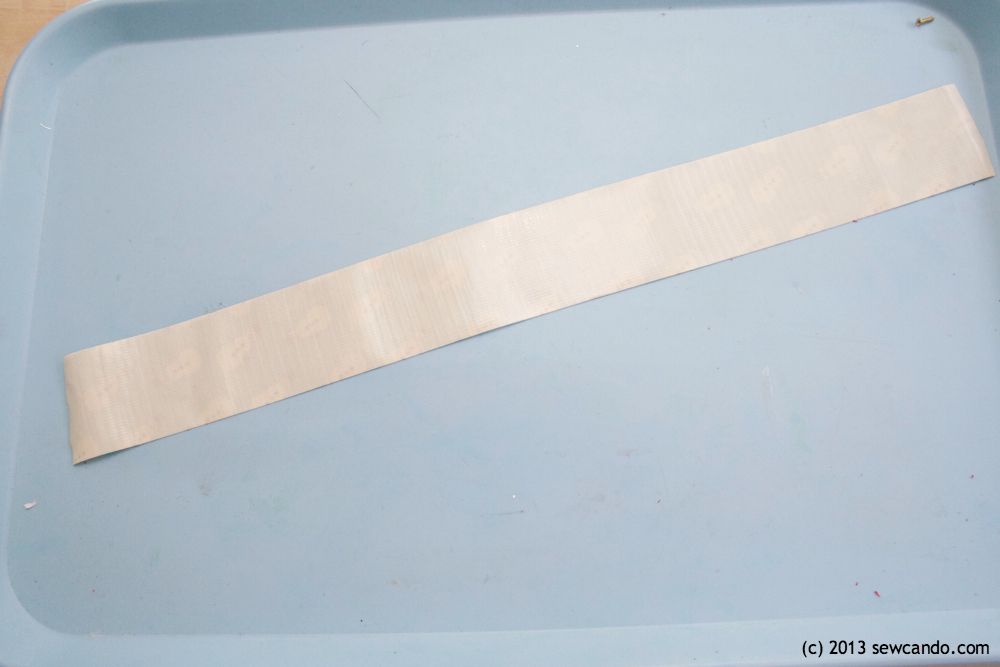
Next, to cover the body, measure around from one side to the other and cut a strip of tape to that length.
Begin at the back end and wrap tape around from one side to the other, smoothing into place:
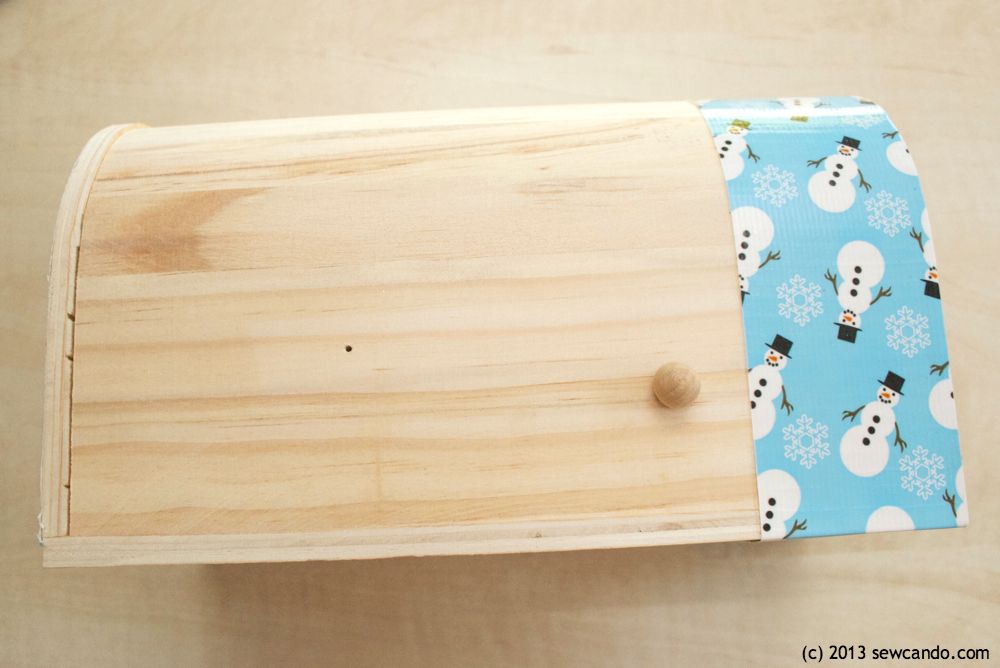
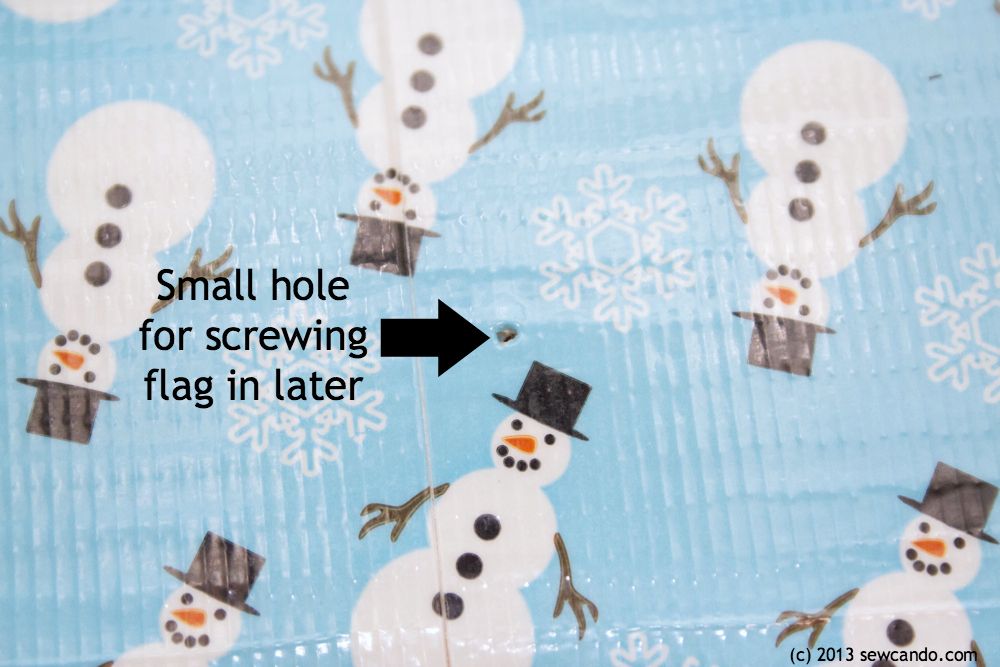
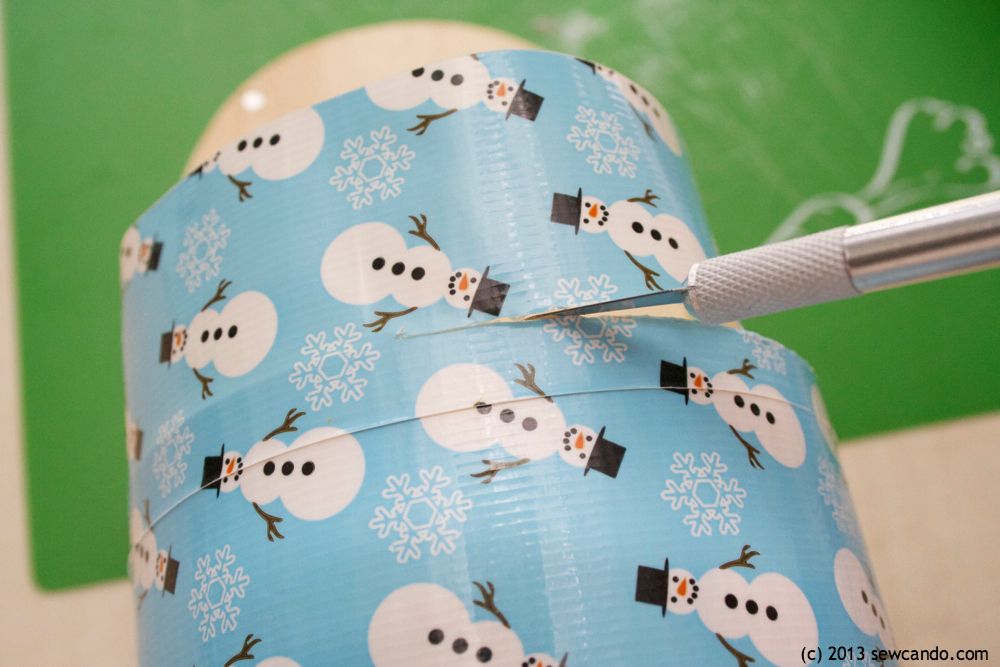
Continue laying strips side by side. I cut a small notch to press the flag stop knob through and a small hole for the flag screw:
With the door open, trim the last piece's overhang over the front.
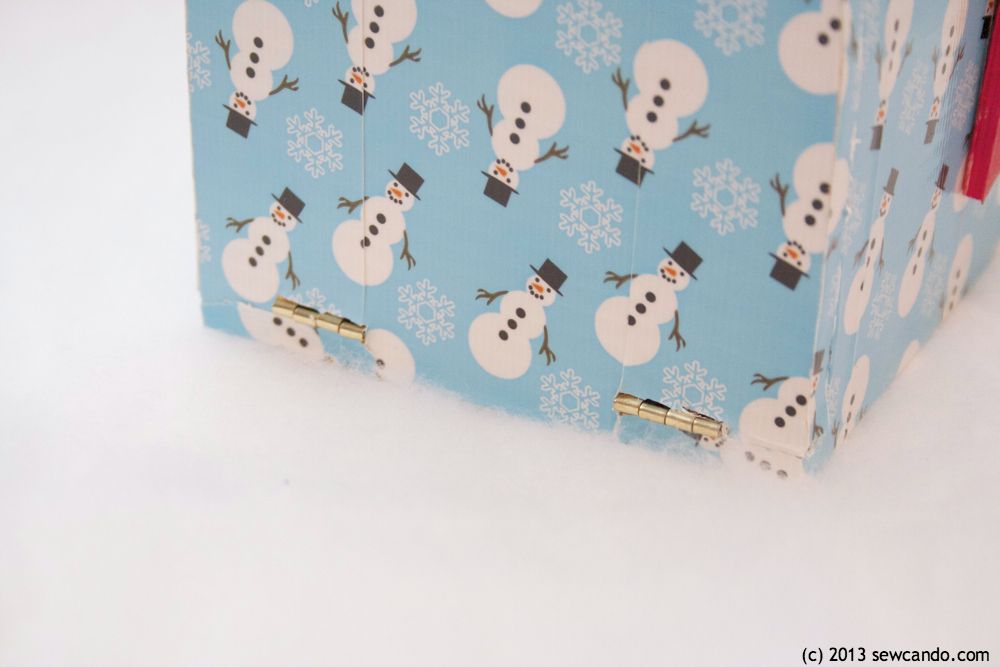
Cover the front door as the back side, trimming around the hinges:
Wrap the door edge with another strip and trim as done previously. Paint inside of door and rim with acrylic paint.
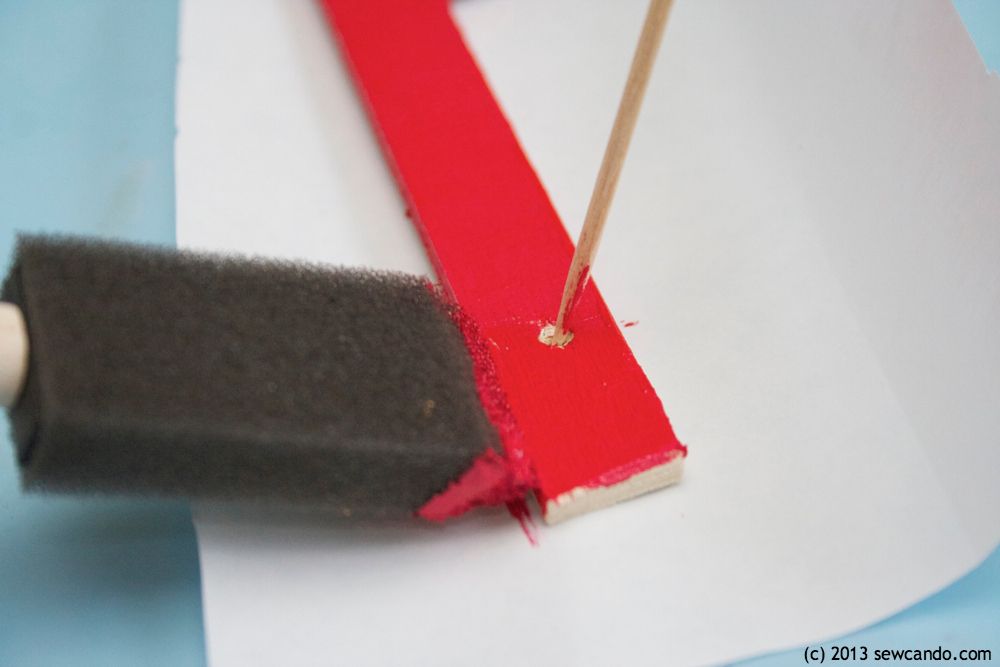
Now take the flag and paint with the acrylic. I found it easy to hold it in place with a toothpick in the hole. Do two coats on all sides.
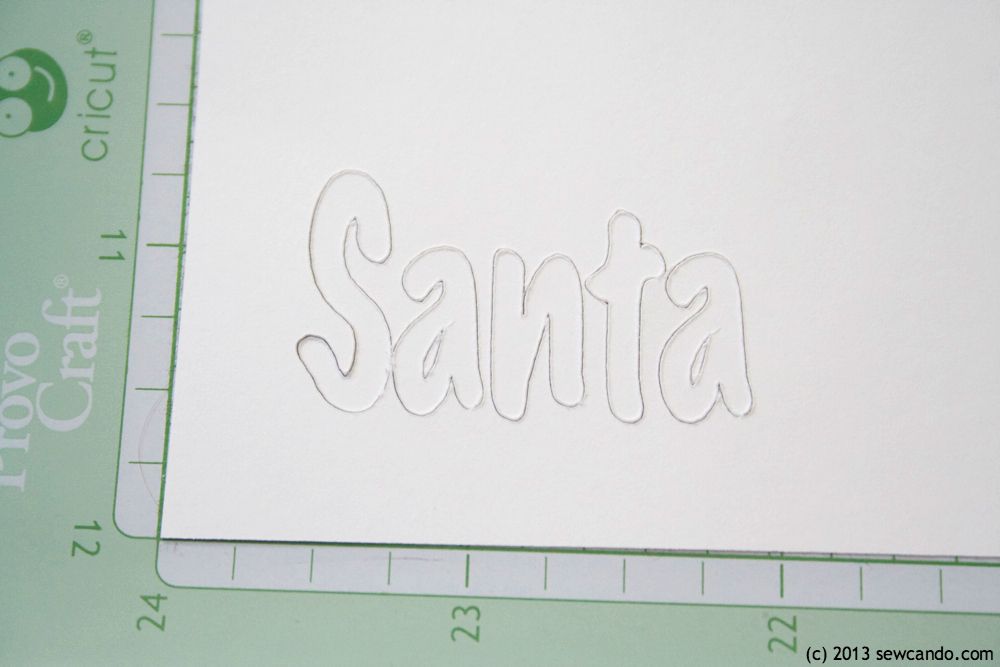
Next cut out card stock lettering using utility knife or cutting machine:
Add a thin coat of Mod Podge to flag front, place lettering on top and seal with a further two coats of Mod Podge on top.
When dry, screw into mailbox.
Now the mailbox is ready for letters and the big guy in red can find out what's on everyone's wish list.
Follow Duck Brand® on Twitter @TheDuckBrand for more fun project ideas and share your own on Twitter & Pinterest with #DuckTheHalls hashtag!
I'm also sharing this project with my FAVE LINK PARTIES.
Click HERE to check them out!
Really cute and clever use of this decorative tape. Santa should love it!
ReplyDeleteEven if someone has been naughty all year long and then made a letterbox like this, I am sure Santa will still make a stop :)
ReplyDeleteThat's what we're hoping;)
DeleteThat's very cute, love the snowmen duct tape.
ReplyDeleteAnother adorable tutorial! Love it, thanks for sharing . . . will be back after the holidays for more creative inspiration. Hope to see you again at the Thursday Favorite Things Blog Hop at Katherine's Corner! Nina @ mamas*Little*treasures
ReplyDeleteThis is so super cute! I am behind on the whole Duct tape thing. So much fun!!! I could see this as a fun valentine box too... Great idea darlin'!
ReplyDeleteThanks Krista - don't worry I have been too (this was my first Duck Tape project!). And you're right this would be ideal for Valentine's too...may have to make another one;)
Delete